Saturday, August 25, 2012

T-shirt Tank Top

Here's another quick and easy project I did, with just a T shirt and a pair of scissors. I was in a hurry to get it finished and in the mail, so I didn't take a lot of pics, but here are the directions, and the finished product.

This was a mens extra large, with design only on the front. It could be made with a smaller shirt, but I was making it as a maternity shirt for my daughter.

Cut around neckline, to make a scoop in front and back. Cut off the sleeves, making the shoulders as wide or narrow as you like. Cut the hem off the bottom of the shirt, and then cut a narrow string from the shirt, where you just cut off the hem. This should be about 1/4 to 1/2 inch wide.. Gather the back, between the sleeve holes and wrap the string around several times. Tie a knot. I put my knot on the inside so it wouldn't show, but you could leave it on the outside, and make a bow. 

My daughter loved this one, because it was big enough to go over her big baby belly. She says she can't wait to wear it as a beach cover-up, over her bikini, later, or as a regular shirt, over a tank.


This one get a big DONE! Save Ferris!

Thanks for reading!
Happy crafting!
Crafty Claudia

Thursday, August 23, 2012

Tile Trivets

They say inspiration comes from all kinds of places.  This one came from home depot.  We were wandering the store the other day, and happened to come upon these beautiful 6x6 inch tiles.  I knew my daughter didn't have any trivets, so I had her pick one she liked.  They came in boxes of 4, and I think they were around $6 a square foot.... which happened to be a box.  So we made 4.  I picked up the little sticky non-skid stoppers and we she got to work. 
The bottoms were very dusty, so we she scrubbed them with a damp cloth, and let them dry thoroghly. Then she stuck those little non skid thingies on each corner.


 That is another project that gets a "DONE" stamp! Use them individually, or together, depending on the size of the job!  I think she has used them every day since we she made them!


Thanks for joining me!
Happy Crafting!
Crafty Claudia

Wednesday, August 22, 2012

Baby Blanket

My new grandson finally arrived! Both mom and baby are doing well. He is beautiful, and I am ecstatic to add another to the family.

While we're waiting, my daughter tackled another project.  She made a baby blanket. I have to say, she did a great job, and it was very inexpensive! I didn't think to take pics, so I only have one of the finished product, but it was super easy!

We found this great flannel plaid on clearance for $1.50/yd. We also purchased the black quilted fabric for $5.99/yd. We already had the white thread, and she used that for accent. She made it the same way as the burp cloths, except we left a larger opening for turning.  This method worked well for this size blanket, but I am not sure I would recommend it for a larger one. 

So, total cost, under $7.00 and a little over an hour, not sure, because we stopped to talk ... a lot.
 
Thanks for reading my blog...
Happy Crafting!
Crafty Claudia

Friday, August 17, 2012

Flannel Burp Cloths

So, No baby yet, but while we're waiting, I bought my daughter a new sewing machine.  I went with an inexpensive machine from Walmart.  I figured it would be a good starter machine for her.  I have had the opportunity to use it a few times, and I love it!  I got her a Brother, and it was under $100. She hasn't really done any  sewing before, so we started out easy.  

Her first project was burp cloths. We used flannel, but any fabric would work. Fat quarters worked great for these.  She cut them in half, and mixed and matched the prints. She used plain white flannel for the liner, to make them more absorbent. If you are using a thinner fabric, simply add more layers of the liner.  
Simply stitch right sides together, with lining on bottom of pile.  We did straight seems with about 1/2 in seam allowance, leaving about 4 inches open on one side for turning.  Trim seam allowance to 1/4 inch, except where opening is. Clip corners close. Turn right side out, and press, taking care to tuck and line up the opening.  Topstitch about 1/4 inch from edge.  


All finished, and so cute!

Thanks for reading!
Happy crafting!
Crafty Claudia
 

Tuesday, August 7, 2012

So, I know I haven't posted in a while.  I have been very busy! I have managed to squeeze in a few projects, and get some pics along the way.  Along with my regular almost 40 hour job, we have been moving.... to a house that needed lots of work.  So we cleaned and painted, and such.  Then, I have taken a month to go to Tennessee to welcome a new grand-baby to the family.  He is not here yet, but I am posting from Tennessee, eagerly awaiting his arrival.  So, although this post might not have any crafts in it, I wanted to let everybody know what has been going on.  I will have posts coming up, as often as I can sneak off and post them.  This area is beautiful, and I am totally enjoying my visit with my daughter and her wonderful husband.

Some projects that I have in mind for the next few weeks...

Hand Print T-Shirts
Tile Trivets
A Baby Quilt
And any other projects I come up with while I am here.   But first, I am off to paint the new baby's bedroom!

So, until next time...
Happy Crafting
Crafty Claudia

Friday, June 8, 2012

Have a crafty weekend!

Well, as sometimes happens, I did not get the projects finished that I had in mind this week.  I have the T-shirt Challenge about half way completed (I am at 3), and some new projects on the table.  So many ideas, so little time.

I did complete a small project for my job... I know, 3 letter word... Gets in the way of my fun time, but still a necessity... I finished 3 craft projects, with the rest on the table, ready to go.  I scored 3 more awesome shirts at Goodwill, and managed to take a chunk out of my thumb on the only night I was home to cook this week.

So, as a substitution for a craft project for you this week, I am going to pick YOUR brain...

I am looking for useful craft ideas for these...
I put at least one of these in the recycle bin each week... There myst be something to be done with them, my own style of recycling them... So, any ideas? You can comment here, or email me. I will try to get to them as soon as possible.

Thanks for reading my blog,
Have a crafty weekend!
Crafty Claudia
KraftyKlaudia@gmail.com

Thursday, May 31, 2012

Cut up T Shirt

In case you haven't noticed, I love T shirts... I love to cut them up and make other things out of them.  They are one of my favorite mediums... I have piles of things I have made from them, and so many more ideas to go.  Sometimes these projects become something totally different, and sometimes, a T shirt is just that, a T shirt.  I have a very difficult time, leaving them as is... This brings me to today's post... Call it a tutorial if you'd like, what ever makes you feel better.

I had a great trip to a local thrift store the other day, and scored these two great shirts. The best part, I only spent $5.50 for both!  

They are a little tight on me, but I can fix that!  Today, I started on the black ACDC Shirt with the raglan sleeves. What a great idea I had for those sleeves!


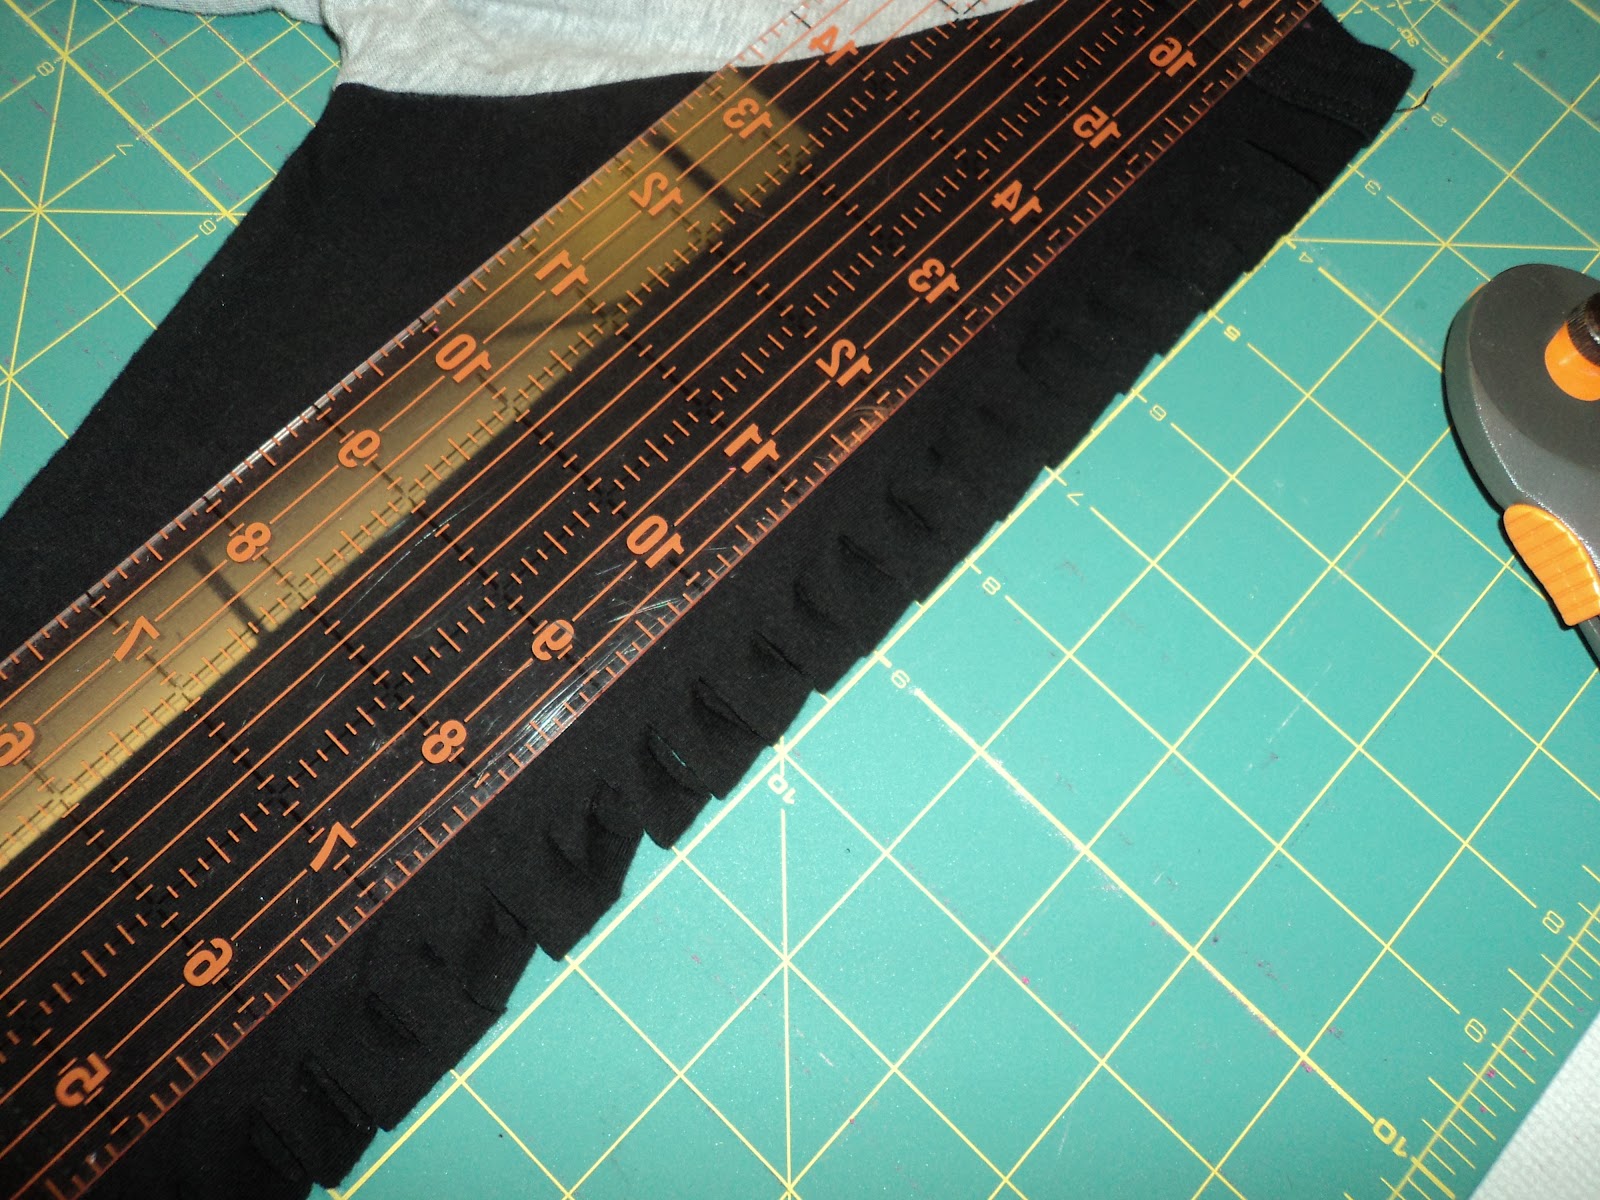
I folded the sleeve flat. along the top, I cut slits about 1/s inch into the shirt, and about 1/2 inch apart. I started about 1/s inch from the neckline, and finished about that far from the hem.  I used my rotary cutter, but sharp scissors will work just as well.

This is what it looked like when I unfolded it.
Pull to stretch. the fabric will curl on itself... you want this.

Repeat on other sleeve.

You can stop there, or do more like I did.

Next I wanted to cut the back.  How you do this is a matter of personal taste and preference.  I don't like to wear a tank under my T's, and I don't like my bra to show, so I just cut at the top of the back.  You can cut all the way down, or as far as you'd like.  There are no rules!  Be creative!

I folded the T down the back, making sure the front was clear. Then I used a piece of paper as a guide and cut my slits  down the back. Once again, I used my rotary cutter, but sharp scissors work fine.  I spaced these about an inch apart. and got shorter as I went down the shirt. I put the shirt on, and measured from the neck to my bra so I knew where to stop.  


I also started about 3 inches down the back, to avoid the "tagless" label in this shirt. If you start too high, it will show when the fabric curls on itself.  I found that out the hard way... think black shirt - white stamped label... Ugh!

Pull to stretch, and you are finished! 

Here is what it looks like on.  It is not as tight, because it stretches more where I have cut it.  Might do more later, and get fancier. But this should be enough to get you started.


I would love to hear how this works for you!  Send me pics, and I will post them!  

Thanks so much for reading!
Happy crafting!
Crafty Claudia
KraftyKlaudia@gmail.com