I am a big fan of Greek yogurt! there, that being said, you can imagine my joy at discovering that I can make this myself, at a fraction of the price of store bought! It is so EASY!
Pour 1/2 gallon of mild into your crock pot. I used whole milk the first time, and 2% this time, both worked just fine. Just don't use ultra-pasteurized.
Turn it on low, and cook for about 2 and half hours, until it reaches 180 degrees. I used a candy thermometer to check it.
Turn it off, and uncover it for about an hour, until it reaches between 105 and 110 degrees.
Remove about a cup of the warm milk, and whisk in a half a cup of store bought plain yogurt, with live
cultures. The one I bought was 5.3 ounces, and I just threw in the whole thing... Pour this back into the crock pot, and whisk to mix..
Cover the crock pot, wrap it in a towel, and put it in the oven, with the oven off, but the oven light on. Wait 7-8 hours, or overnight (my preference)
In the morning, check to see if the milk has turned to yogurt.
If not, put it back for another hour. You
now have plain yogurt. Pop it in the fridge for at least
3 hours. Be sure to set aside 1/2 cup for next time!
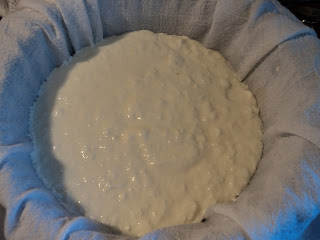
Here is where it becomes Greek yogurt. Put a colander lined with several layers of cheese cloth, or a plain white dish towel into a large bowl.
Put your yogurt into the colander, and put it back in the fridge. Let it drain for an hour. Pour out the liquid that has accumulated in the bowl. This is the whey.
Return the yogurt to the fridge and let it drain another hour. It should be very thick by now.
Pour your yogurt into a storage container, and you are done! You now have plain Greek yogurt, ready for whatever flavoring you'd like to add, honey, fruit, vanilla..
I got almost a quart of whey, and a quart of Greek yogurt. Total cost...$2.44 for the milk and $.94, or $3.38. Next time, I wont have to buy the yogurt, because I will use my yogurt as a starter.
I added some frozen berries and mango, and some local honey. It was a great breakfast!
Let me know if you try this! I love it, and it is so easy!
Thanks for reading!
Crafty Claudia
Friday, November 16, 2012
Friday, November 2, 2012
Pumkin Beer Bread

This week I decided to try to make bread. As a child, I helped my mother make bread on a fairly regular basis. I remember how that fresh baked bread smelled and tasted, still warm from the oven. It didn't even need any butter! I also remember the time it took to make it, mixing the dough, letting it rise, punching it down, letting it rise again, kneading it, and finally baking it. So, I procrastinated..

Then I heard of beer bread! Beer bread, you say? I like bread and beer, so I looked it up. No yeast? Really? No rising, no all day investment? This bread was for me! I found what looked like an easy recipe, and decided to tackle it! 6 ingredients, all of which I had on hand! I didn't want to use just any beer, and went with a Pumpkin Ale.
Here is the recipe I used from Food.com. I would definitely recommend it! I used the full 1/2 cup of butter, put half in my pan
before I put in the dough, and half
on top. The bottom crust was crispy,
almost like it was fried. Most of the
butter ran out onto my counter when
I toppled the bread onto the rack to
cool, so I will definitely go with 1/4
cup next time.


My bread came out fantastic... crunchy on the outside, and moist and dense on the inside. I was so excited, I wanted to make another right away! And, it only took a little over an hour to make! I think I'll use and apple beer next time. Maybe I'll add some nuts, raisins and cinnamon.... MMMM... Sounds yummy!
Let me know if you try this recipe, and how it comes out!
Thanks for reading!
Claudia
Subscribe to:
Posts (Atom)


